The Slushie Science Experiment
 Erin Crowell
Learn the science of freezing point depression with our hands-on Kitchen Lab!
Kitchen Lab: The Slushie Science Experiment
Welcome to the Kitchen Lab! At Happy Kids Nutrition Academy, we believe that the best way to learn about nutrition and science is by getting your hands a little messy (and maybe a little cold). Today, we are ditching the textbooks and turning your kitchen counter into a scientific research station.
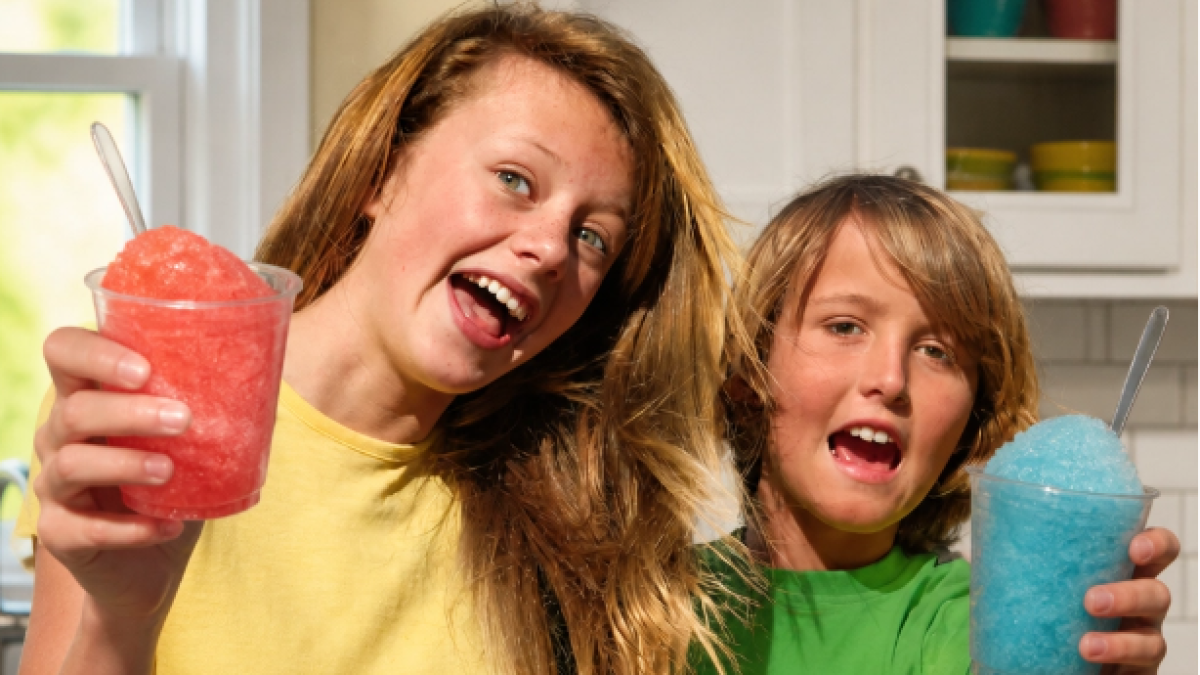
If you’ve ever wondered how you can turn a liquid into a delicious, icy slushie without using a fancy machine, you’re in the right place. This experiment isn't just a fun afternoon activity; it’s a lesson in thermodynamics, states of matter, and: most importantly: how to make a healthier version of a classic treat.
Grab your lab coats (or just an old t-shirt) and let’s dive into the "Slushie Science" experiment!
Setting Up Your Lab Station
Before we start shaking, we need to make sure we have all our scientific equipment ready. Part of being a great scientist is preparation! This experiment uses everyday household items, making it an easy win for a rainy afternoon or a weekend learning session.

Materials Needed:
- 100% Fruit Juice: Choose your favorite flavor! Apple, grape, or orange work beautifully. (Avoid "juice drinks" with added sugars: we'll talk about why in our Nutrition Lab section below).
- Ice: You’ll need enough to fill a gallon-sized bag about halfway.
- Salt: Coarse salt or rock salt works best, but regular table salt will work in a pinch.
- One Small Ziplock Bag: This is for your "test subject" (the juice).
- One Large Ziplock Bag: This will be your "cooling chamber."
- A Kitchen Towel or Oven Mitts: Trust us on this: it gets very cold!
If you’re looking for more ways to combine food and learning, check out our upcoming live classes where we explore the chemistry of cooking in real-time with other young scientists!
Step-by-Step Experiment Instructions
Ready to make some magic happen? Follow these steps carefully to ensure your slushie reaches the perfect consistency.
1. Prepare the Sample
Pour about 1 cup of your 100% fruit juice into the small ziplock bag. Before you seal it, try to squeeze out as much air as possible. A tight seal is crucial here: nobody wants salty juice!
2. Prepare the Cooling Chamber
Fill your large gallon-sized bag about halfway with ice. Now, pour about 1/2 cup of your salt over the ice.

3. Combine and Seal
Place your small bag of juice inside the large bag of ice and salt. Make sure the juice bag is nestled deep into the ice. Seal the large bag tightly.
4. The "Shake-a-Thon"
Put on your oven mitts or wrap the bag in a kitchen towel. Now, shake, squish, and roll the bag for 5 to 10 minutes. This is a great time to put on some music and have a kitchen dance party! You’ll feel the bag getting incredibly cold: that’s a sign that the science is working.
5. Harvest Your Results
After about 8 minutes, peek inside the small bag. If the juice has turned into icy slush, you’re done! Take the small bag out, rinse the outside with cold water (to remove any salt residue), and pour your slushie into a glass.

The Lab Report: Why It Works
As an organization dedicated to education, we want our students to understand the why behind the wow. This experiment is a perfect demonstration of Freezing Point Depression.
The Mystery of the Melting Ice
Normally, water freezes at 0°C (32°F). When you have a bag of ice, it stays at that temperature until it melts. However, to turn juice into a slushie, we need to get the temperature even lower than the freezing point of water. This is because juice contains sugars and natural minerals that actually lower its own freezing point.
Enter: The Salt
When you add salt to the ice, it lowers the freezing point of the ice even further. This is why cities put salt on the roads in winter! The salt forces the ice to melt, even though the temperature is still very cold.
But here is the cool part (literally): In order for the ice to melt, it needs energy (heat). It "steals" that heat from the closest source available: your bag of juice! As the ice melts into a super-cold saltwater brine, it sucks the heat right out of the juice, cooling it down below its freezing point and turning it into those delicious icy crystals we call a slushie.
If your teen is fascinated by how ingredients interact, they might love our Introduction to Macronutrients course, where we break down the building blocks of the food we eat every day.
Nutrition Lab: Juice vs. Syrups
While we love the science, we also care about the "fuel" we’re putting into our bodies. Traditional store-bought slushies are often made with high-fructose corn syrup, artificial dyes, and synthetic flavorings.

The 100% Juice Advantage
In this experiment, we used 100% fruit juice. Why?
- Natural Vitamins: 100% juice (like orange or grape) provides Vitamin C and potassium.
- No Added Sugars: You’re getting the energy from the fruit’s natural fructose rather than processed white sugar.
- Antioxidants: Many juices, especially darker ones like pomegranate or purple grape juice, are packed with antioxidants that help keep your cells healthy.
While we always recommend whole fruit as the best option (because of the fiber!), a 100% juice slushie is a fantastic, hydrating alternative to soda-based frozen treats. It’s all about making informed choices: a core value we teach in all our Happy Kids Nutrition Academy courses.
Join the Community!
We hope you and your kids had a blast with this Slushie Science experiment. At Happy Kids Nutrition Academy, we are passionate about making health education interactive, supportive, and accessible for families everywhere.
Did your slushie turn out perfectly? Did you try a unique flavor combo like apple-cranberry? We’d love to hear about it! You can share your "Kitchen Lab" photos with us or reach out via our Support page if you have any questions about our programs.
For more hands-on activities and evidence-based nutrition tips, be sure to keep an eye on our blog and check our calendar for upcoming group classes. Let's keep the learning (and the shaking) going!

Categories: : Kitchen Lab